
- How to Put Sandpaper On a Sander
- How to Keep Sandpaper On Orbital Sander (Attachment Base)
- Step 01- Gather All the Materials
- Step 02- Attaching Self Adhesive (PSA) Sandpaper
- Step 03- Attaching The Hook & Loops
- Step 04- Installing The Sheet Attachments
- Does This Tool Allow Regular Sandpaper?
- Frequently Asked Questions (FAQ)
- How to Keep Sandpaper On Orbital Sander?
- What Is the Best Sandpaper For Random Orbital Sander?
- How Do Sanding Pads Stick To Sander?
- Final Wrap
As the name suggests, you may think of an orbital sander that appears to be round. Though, those power tools are square. The great advantages of this tool are that it allows it to reach into any corners and along with straight edges. An orbital sander is more versatile than any standard belt sander to sand the workpieces.
But without attaching the sandpaper to it, you can’t start the job as well. Not only this, but you also need to choose the right sandpaper. Some traditional woodworkers, carpenters, applied their strategies to arrange the sander grit on this tool.
However, here we only focus on how to attach sandpaper to an orbital sander, connecting 3- varied inclinations, etc. So let us dive into the depth.
How to Put Sandpaper On a Sander

Putting any sandpaper on any sander is nothing but a self-striking process. If you’re an expert on this task, it will take more than a few minutes to adjust the sandpaper for random orbital sander.
Step 01- Read Out the Manufacturer –
But it’s well known, reading out the manufacturer’s instructions is incredibly crucial. By this, you can determine which sandpaper types of disc it will need. It will also let you know what particular size the sander needs to fit. With this, you can also see the number of holes in the disc.
Alternatively, if you’re unable to find them out there, search them up online. This website is typically designed for getting information about the specific sizes and number of holes in the disc. There you’ll get the accurate dimensions of sandpaper for a random orbital sander.
Step 02- Choose The Appropriate Sander Disc
Although, if you choose the sanding sheets, they also come in three sizes, so think about the necessity of the random orbital sander sandpaper. Paper, block, and film are the primary distinctions of this paper. Among them, paper backing is the cheapest and most affordable disc.
The film backing is suitable for wet sanding and a more consistent finish. The cloth or fabric backing is highly appreciated, using or finishing any heavy-duty projects. Although the cloth backing is very tear-resistant, it’s not recommended to use sandpaper for electric sander.
However, we will divide the task into three to vividly introduce every step to you. Let us jump through the main task.
- Attaching self-adhesive (PSA) sandpaper
- Attaching the hook & loop sandpaper
- Installing the sheet attachment sandpaper
How to Keep Sandpaper On Orbital Sander (Attachment Base)
Step 01- Gather All the Materials
First, assist in collecting all the vital materials needed for this task. As though the sandpaper, orbital sander all together. Then go for the next.
Step 02- Attaching Self Adhesive (PSA) Sandpaper
Self-adhesive is the multipurpose orbital sander sandpaper. Self-adhesive, also known as a PSA sandpaper. PSA is the sandpaper for square sander.
It is gently refined and shaped like dried metal clay. So here is the guidance you have to follow.
- In these steps, you’ll learn how to put sandpaper on an orbital sander. For this, unplug or discard the sander and lay it down at a safe distance. Turn it over as if you’re backing up the backing pad. Also, ensure that the sanding location and the plate are tidy and clean. Unless this power sander sandpaper may get stuck in the middle of the work.
- Peel or tear the nylon liner that is attached to the disc. It will reveal the flat surfaces and then slap the sticky surface over the pad.
- Adjust the backing pad to the dust collector. Ensure the pad has equal holes as long as the dust collectors. Usually, the random orbital sander has 6-8 holes inside it.
- The holes here work on omitting the dust from the orbital sander to remove paint.
- Now remove the paper backing of the sandpaper and expose the self-adhesive.
- Then adjust it to the plate and press it evenly. If you get confused on how to attach sandpaper to a hand sander, try to focus in the middle of the sander. It all relies on its middle part.
- Then smooth the surface and drag all the bubbles or any folds if remaining.
- Finally, plug the sander inside it and test to confirm the paper has attached well.
Step 03- Attaching The Hook & Loops
The hook and loop sandpaper looks similar to the Velcro. It is another top sandpaper for the orbital sander. Sanders supports hook and loop, constructed with the methods of quick attach sander. It had microscopic hooks that corresponded to tiny circles on their backings. To connect the hook and loop sanding disc, do follow the below steps-
- First, face the sander upside down.
- Then place the surface of the disc. Here you find the tiny loops on the backing pad, next employ the pressure.
- Next, keep pressing both surfaces together.
- Lay down the disc aligned with the sides of the plates, press the sanding disc to manage the plate evenly.
- Plug the sander and test it by placing a piece of wood inside.
- By doing this, it will ensure that the attachments are correctly arranged. Also, check the hooks have latched onto the loops compactly.
You’re all done. The attachment will create a strong bond over both surfaces. The surfaces can be peeled back whenever you shift or change the discs. The hook and loop is the great dealing sandpaper for power sander. It has an orbital sander attach pad taken off of a traditional palm sander.
Step 04- Installing The Sheet Attachments
Installing the sheet sandpaper is likely the sander that can attach to the drill. The sheet sandpaper usually comes with three attachments for doing the job correctly. Let’s see how to connect them accurately.
- Unplug the sander and stick out the sandpaper sheets.
- Fold the sandpaper over both ends of the sanding disc.
- Here you need a clip or level to move it into place. So move the disc by using such tools.
- Now secure the paper sheet to attach it to the device.
- The paper size must have been matched to fit into any small sander to attach to the drill.
That’s it. Here you’re ready to go for sanding.
Does This Tool Allow Regular Sandpaper?
Whenever you decide to sand any masterpieces, you may wonder what sander should I choose. Hence, you can use any sort of sandpaper for orbital sander. It is not necessary to use sandpaper.
The basics of this orbital sander rely on its circular statistics. The actual power runs the tool to provide a smooth finish. So here it depends on your opinion. But the central meaning of using any sandpaper is that the working pieces must look stunning and even professional.
However, different types of sandpaper available vary depending on their working goals. As though palm sander sandpaper is for palm sanding tools. Similarly, the drum sander sandpaper is for the drum sanding tools.
Again, the floor sander sandpaper is for the rotating sander tools. Likewise, the particular sandpaper for Dewalt orbital sander works to do the sanding jobs. The differences between sandpaper and sander vary for working purposes. It doesn’t mean you can’t use them for the orbital sander.
The sandpaper will be used for many complex and large surfaces. By the way, check this out for finding the best sandpaper for the orbital sander.
Frequently Asked Questions (FAQ)
How to Keep Sandpaper On Orbital Sander?
To keep the sandpaper on it, turn on the sander deck. Then pull out the sander disc. Keep it aligned to adjust the size of the sander. Lay down the disc and change its attachments to the plate. So that you can do the sanding job evenly. Next, press both surfaces together and plug in to test the extensions. You can place little wooden pieces there to check the attachments that fit correctly.
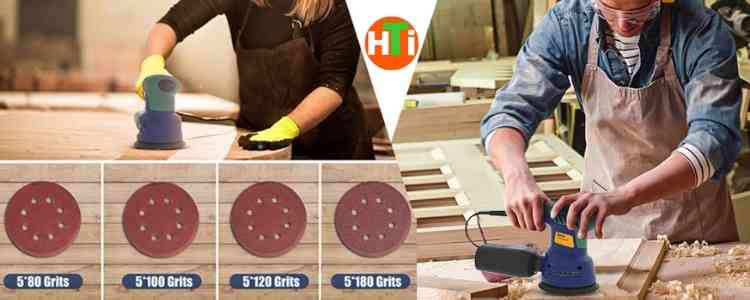
What Is the Best Sandpaper For Random Orbital Sander?
Around 60-80 grit sandpaper is best for a random orbital sander. It is based on the sequence of the wood. 60-80 grits are good for reducing deep marks. Again, the 120 grits can be used to knock down the grain. The 180 grit is the most preferred sequence for smoothing out the sand marks.
How Do Sanding Pads Stick To Sander?
The sanding pad has a backup pad with a nylon hook and loop to hold and receive the discs in place. When the disc gets hot during the process, it will melt and soften gradually. It also has less holding power to get to the point. For this reason, the disc no longer sticks and files off.
Final Wrap
So here are all the attachment details on how to attach sandpaper to the orbital sander. The most additive part here is choosing the particular sandpaper for this. Sanding is the most inheritable task that we need for our home improvements. But before you’re going to start the task, the proper grit sandpaper attachment is a must.
Fortunately, most of the random orbital sanders require the most effortless process. It’s because the sanding disc will need to wear out and change constantly. Lastly, choose any attachments from above and just make it happen most simply.
That’s very good point