
DA sanders are an essential tool for different woodworking and metalworking tasks. They help you get an even, scratch-free, and glossy look of wood or metal surface.
However, the expected result will be unachievable if you don’t know the process of using a DA sander. Unfortunately, most people are unaware of how to use a DA sander.
If you plan to buy a DA sander for your next project, HANG TIGHT and continue reading this guide.
- How to Use a DA Sander – Step by Step Guide
- Step 01: Sanding Pad Attaching
- Step 02: Turn the Sander On and Begin Sanding
- Step 03: Finish Sanding and Check the Result
- 10 Tips to Follow When Using a DA Sander
- Read the Owner’s Manual Carefully
- Configuring the Sander is the Key
- Right Sanding Pad is Necessary
- Gently Sand
- Be Steady & Slow
- Store the Pad on a Flat Surface
- Avoid Providing Much Pressure
- Use Overlying Sanding Motion
- Consider the Wires While Working
- Regular Maintenance is Necessary
- Wrapping Up
How to Use a DA Sander – Step by Step Guide
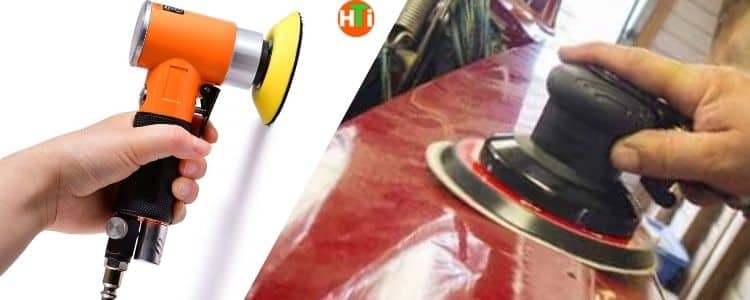
DA sanding is effortless. Little practice is enough to get the desired result. Also, the learning curve is less. Here is the step-by-step process.
Step 01: Sanding Pad Attaching
First, get a DA sander pad and attach it to the sander. While buying a sanding pad, make sure the pad is compatible with your DA sander. Unfortunately, people buy unfitted sanding pads and waste valuable time, money, and effort, especially beginners. In addition, an unfitted sanding pad will decrease your workflow.
Step 02: Turn the Sander On and Begin Sanding
Second, press the power button and turn the sander ON. Now, gently push the sander over the working material. While sanding, follow the back and forth motion. Apply enough pressure to keep everything even. Moreover, avoid providing too much pressure and go faster.
Use both hands to control the sander. You might have seen that professionals are using their single hand and getting an excellent finish. However, don’t consider working like a professional since you are new and unfamiliar with the DA sander. Controlling will be much challenging if you work with one hand.
Step 03: Finish Sanding and Check the Result
Once you finish the complete pass, turn the sander off. Since you are new to the process, unevenness will be there. No worries if you find so because the solution is there. In this case, set the sander to its lowest speed level and work over the uneven surface.
Finally, check the finish and, if required, continue to the same process until you get the required finish.
Our top 5 picks are perfect for those who do not wish to spend a lot of time researching the market.
Best Image | Product Title | Best | Speeds | Price |
 | ZFE Random Orbital Sander | Editor’s pick | 10000RPM | |
 | Zhong An Dual Action Palm Sander | Our top pick | 12000RPM | |
 | Autolock Air Random Orbital Sander | Runner up | 12000RPM | |
 | UPWARD Air Random Orbital Sander | Best budget air | 12000RPM | |
 | ZEE Mini Air Sander Auto Body Work | Best for beginners | 15000RPM |
10 Tips to Follow When Using a DA Sander

Although battery-operated or electric DA sander using processes is pretty straightforward, mess up can happen anytime. In this section, we discussed a few essential tips that you need to keep in mind.
Read the Owner’s Manual Carefully
Before operating the machine, it is important to read the owner’s manual meticulously. Everything is instructed in the manual, and every problem has a solution. With the manual, you can get familiar with the sander easily and quickly. So, read the manual.
Configuring the Sander is the Key
Dust collection, variable speed, and intensity are the common features of the modern DA sander. But, first, you need to find the sweet spot between efficiency and smooth performance. For this, configure the machine according to your workpiece.
Right Sanding Pad is Necessary
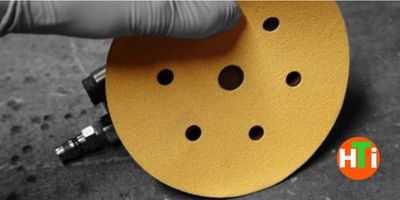
It is one of the mandatory factors that you must not overlook. The sanding result depends on the accessories. Buy a fitted pad and check the grit size as well. Once you are sure that the pad is ideal for your sander, attach it. Incorrect grit size will cost you thousands.
Gently Sand
Don’t get confused or worried while working with a DA sander. Instead, be confident and gently work with the sander. Gently hold the machine to control and maneuver it easily. A gentle push will help you guide the tool wherever you want.
Be Steady & Slow
High-speed is not good at all when you start sanding a plank of wood or metal using a DA sander. Unfortunately, most people start sanding with high-speed settings, which is a great mistake. With a speedy sander, the expected result will not be achievable, and controlling the sander will also be challenging. So, begin sanding with low or medium speed. Then, gradually increase the speed according to the project requirement.
Store the Pad on a Flat Surface
While working, don’t keep the pad following an angle on the workpiece. This way, swirl marks can easily be avoided, and the surface will get a smooth look. Moreover, in angle position, the dual-action mode will not work. You will get the desired finish when you keep the sander flat on the surface.
Avoid Providing Much Pressure
Sadly, when we say “gently hold the DA sander,” most people often get misguided and hold the tool aggressively. Avoid doing it.
You must firmly put your hands on the machine while working with the tool and don’t put much pressure.
Use Overlying Sanding Motion
A perfect blend is necessary to get the required finish. For this, overlap the previously sanded surface. All the imperfections and blemishes will hide when you do so.
Consider the Wires While Working
Both cordless and corded DA sanders are available in the market. However, most DA sanders come with a wired option.
Thus, while working with this tool, you need to be of utmost caution. Before turning the machine on, no naked wire is available surrounding the tool. At the same time, be careful when handling the wire.
Avoid unnecessary tangling of the wire. The chance of internal cut will increase if the cables are tangled frequently.
Regular Maintenance is Necessary
Keeping the tool in good shape is essential in order to get a good result from it. So, don’t forget to clean the DA sander after every project. This way, no dust can build up in the outer and internal parts of the tool. So, clean the machine after every use.
Also Read: 11 Solution To Problem For Auto Bodywork Use A DA Sander
Wrapping Up
The sanding task will be more manageable when you use a DA sander. Proper use of this tool will allow you to make the sanding task easy. Moreover, completing sanding will be much more comfortable. Therefore, it is significantly essential to keep the tips in mind and follow how to use a DA sander.
On a final note, be practical while operating a DA sander. Consider following the tips to avoid mishaps.
1 thought on “How to Use a DA Sander – 3 Effective Steps”